
Engine swap
Rotary Time
A good friend of mine from up north gave me a S4 13b 6 port engine and transmission. We made a road trip back up to Minnesota and put all the engine and transmission in the back of our Mazda3. So by this point, I was well into the rust repair on the truck, after driving it though one Minnesota winter the rust progressed a lot. I had to patch the drivers and passenger floor pan near the front cab mounts and both rockers had small holes starting. Ended up being a lot worse than I thought. Once I had that all finished, it was time to pull the 4 cylinder and begin the real fabrication.
My intention was to give the truck new life without the minimum modifications, simultaneously upgrading the power. Through my research and discovery most people who has donethis swap, moved the shifter location back at least 6in. Which puts the shifter next to the driver rather than slightly in front of the seat. I wanted to keep the bench seat for now so that was my jumping off point. I mocked up the engine and transmission together and dropped it in the chassis of the truck. I quickly discovered to have the shifter come through the original tunnel hole that put the front of the engine where the radiator mounts. The truck's transmission will not bolt to the rotary engine because the bell housings are different. I found some people moved the shifter location forward on a RX7 transmission by cutting the shifter housing and tube to move it forward about 6in. People were mainly doing this on Rotary Miata swaps. With all my measurements I needed to move it more than 6in. I took both transmissions apart and discovered the center of the transmissions share the same bolt pattern. I used the front half of the FC RX7 transmission and the back tail housing of the truck transmission with the shifting rods and forks from the truck's transmission. This moved my shifter location forward towards the engine 9in. Success!
Street Ported Intake and Exhaust
Turbo2 Exhaust Sleeves added
Final Mockup Complete
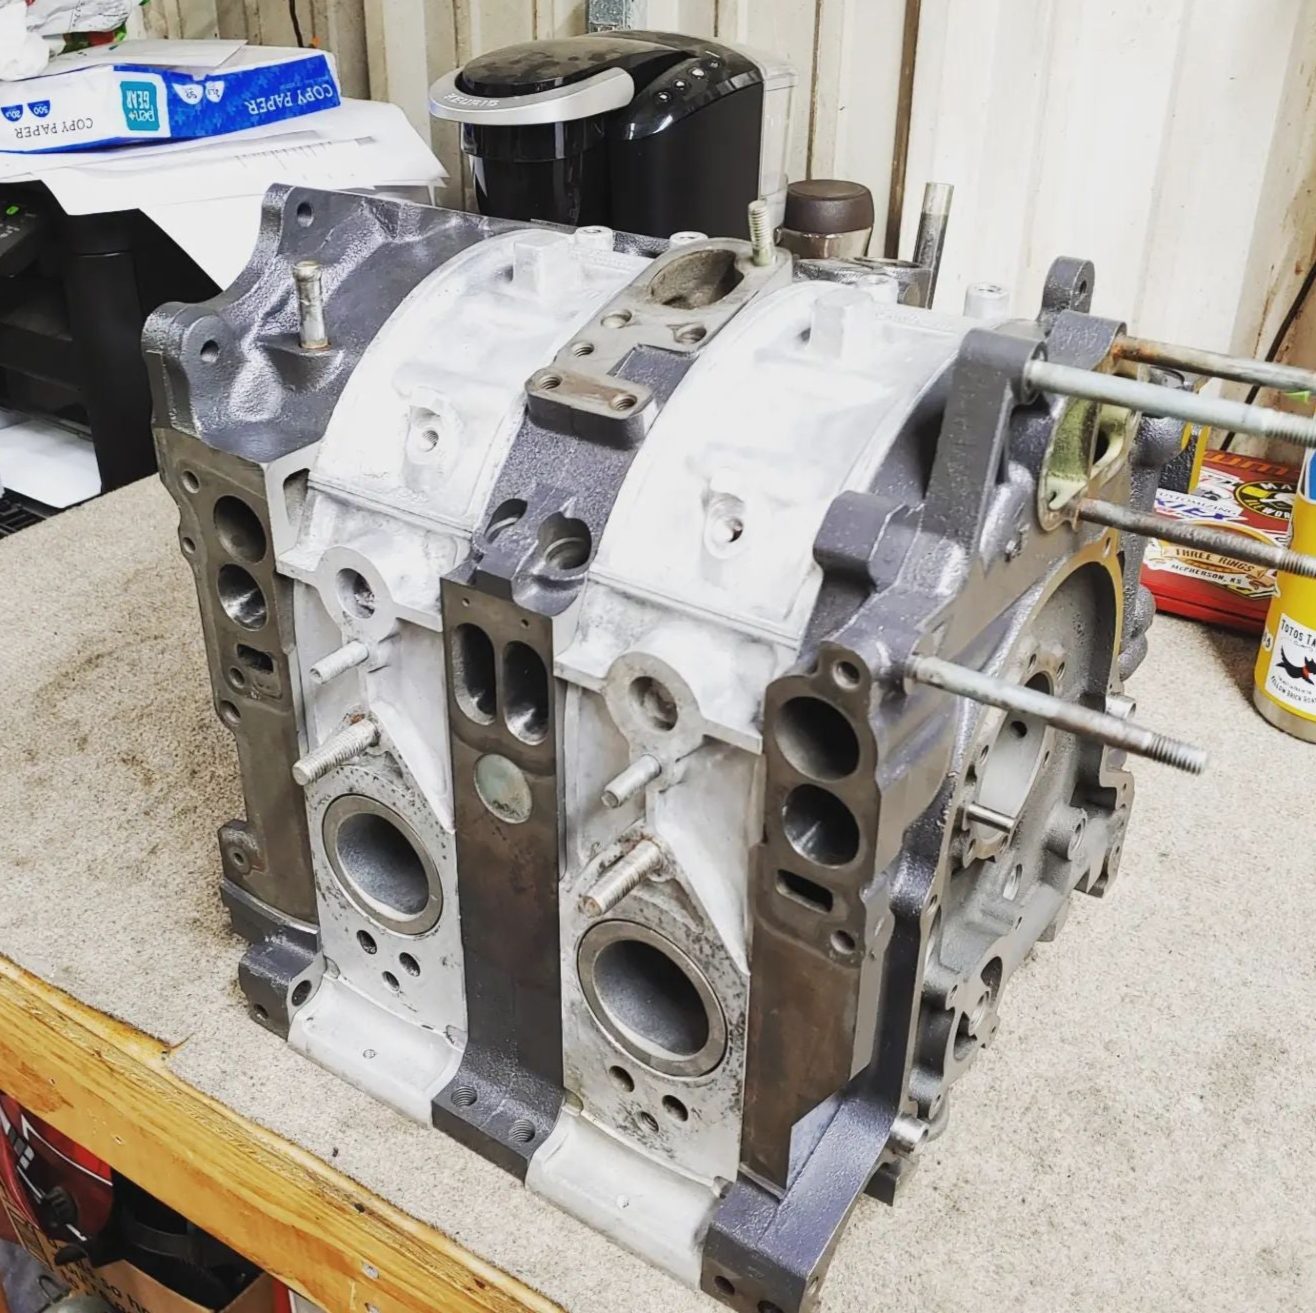
S4 13b 6-Port Block with S5 intake manifold
Fabrication Continues
Also since the tail housing of the transmission is essentially in the same location as it was with the 4 cylinder engine the Drive shaft did not need any modifications!
Now with the mismatched transmission putting my shifter location right where I wanted it. A few more mockups were needed. I put the original transmission cross member in place and the holes were closed but the engine was far from level. I couldn't lower the engine anymore because of the frame cross member in the engine bay. It's a part of the torsion bar suspension so that was my limiting factor there. I placed the engine 1in above that cross member and made a spacer out of square tubing to lift the back of the transmission to level out the engine. One problem solved created another space issue. Now the clutch slave cylinder was hitting the trans tunnel and the starter was super tight against it too.
At that moment I really didn't worry too much about it because I still needed engine mounts….
I went back and forth on how to use the original S4 13b engine mounts, everything was in the way. Almost every rotary swapped B-series I found photos of used a 12a front cover and mounted the engine that way.
In the early spring I made a trip to a salvage yard where I knew there was an FB RX7. To find a donor engine. Thank god these engines are light. The car was buried in a sea of cars, no way to drag an engine hoist in there. So we gathered a ton of chunks of concrete, blocked the whole car high enough off the ground to drop the engine and transmission out the bottom of the car. Drug it out from under there, wrapped a chain around it and with a steel pipe me and my buddy carried it 50 yards like a prised cooked hog ready for feast. Heaved it into the back of a ford Escape along with everything we could possibly take from that car.
Now that I had a front cover to mount the engine from. I ordered a universal LS engine mount kit from summit racing that had poly bushings and trimmed it way down with the cutting torch. Used the 12a front engine mount, cut the ends of it off and pieced it together with the new LS mounts. Constantly measuring side to side to make sure the engine was centered between the frame rails. Tacked it together in place. When I was happy with all that, I pulled the engine again and got my stick welder out and went to town. At that point there was no going back, I cut the original 4 cylinder engine mounts out and ground everything smooth.
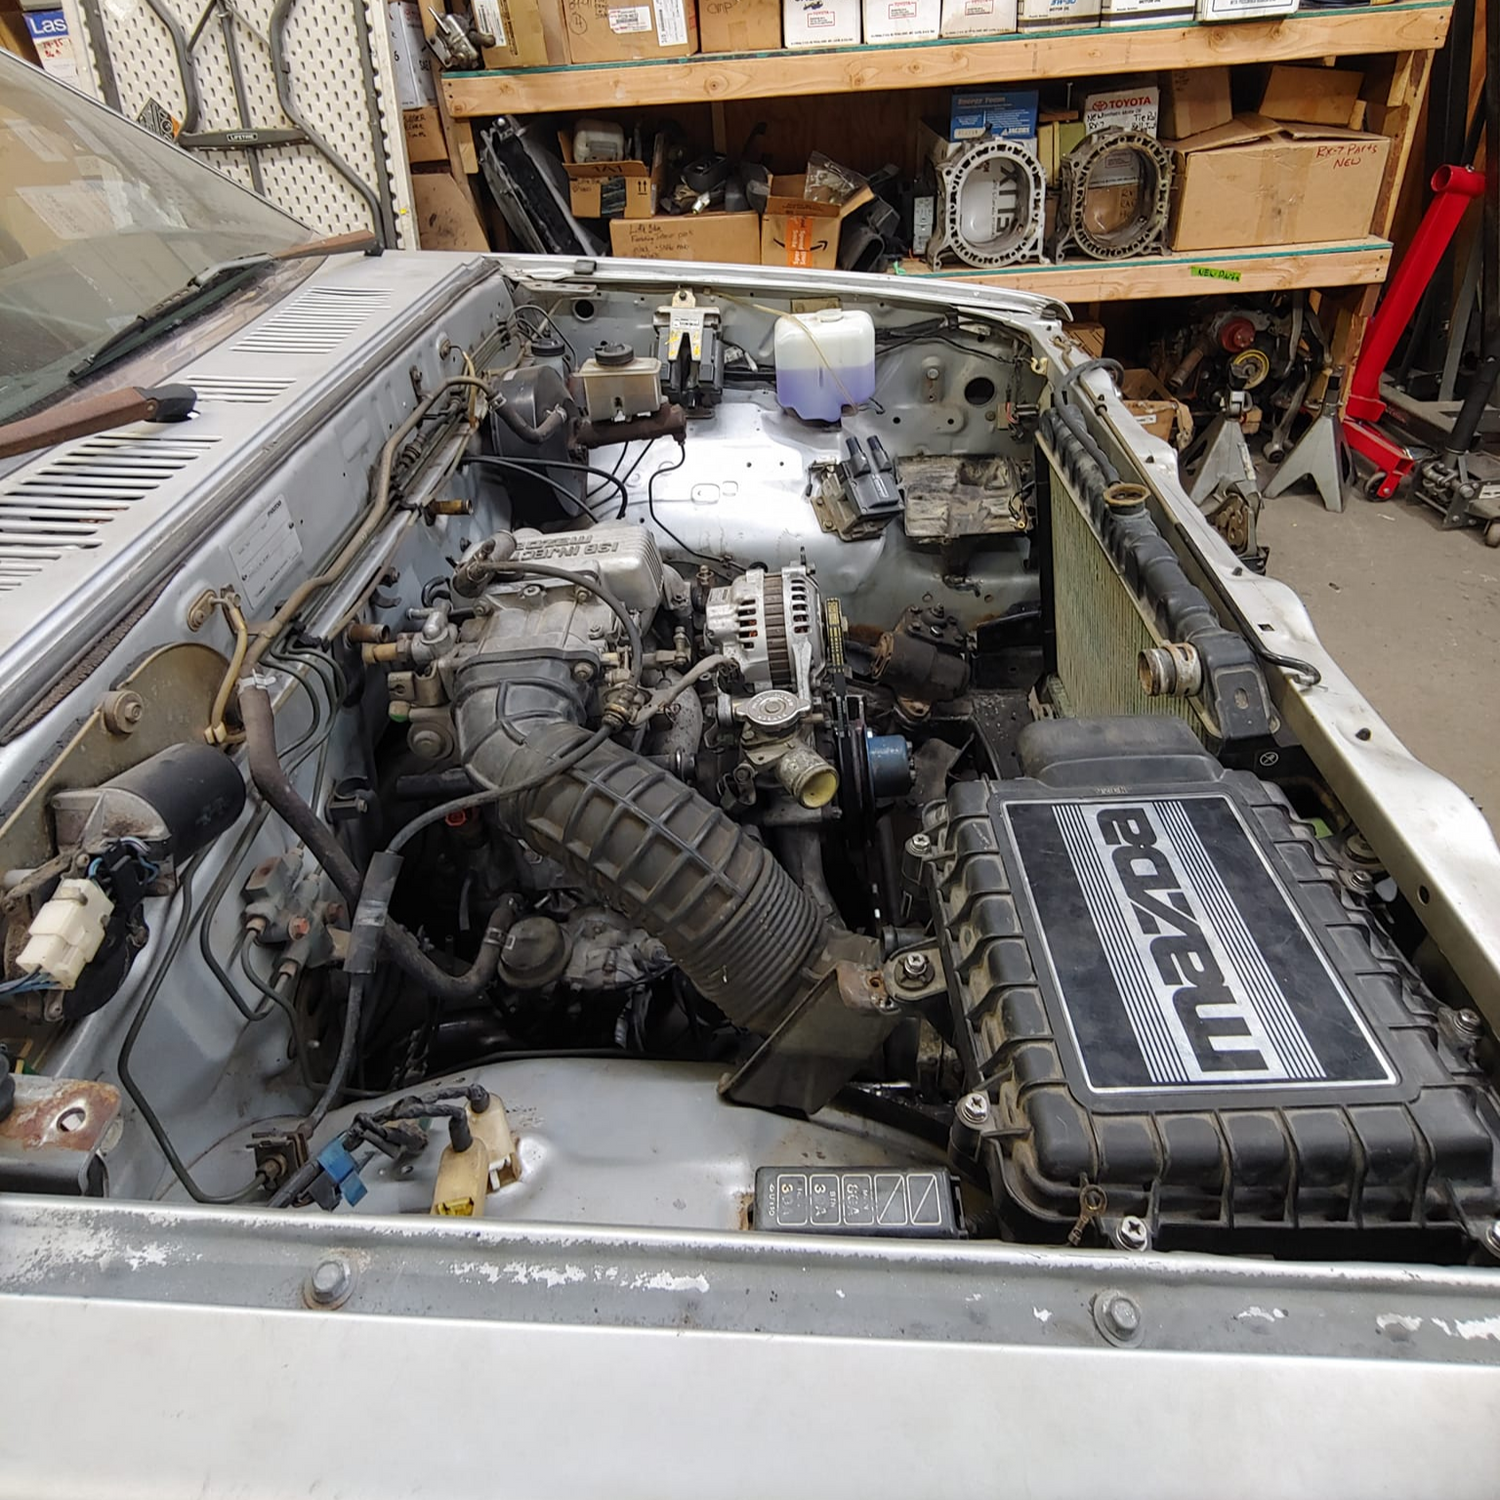
The biggest issue with this swap was dealing with everything being on the opposite side compared to the 4 cylinder. The exhaust, the starter, the clutch slave, it's all flipped to the other side. To solve the clutch slave fitment issue, I ground down the throwout bear fork around where the slave cylinder pushes on it. Then loved on the tunnel with a hammer and a torch to make more room for the clutch slave cylinder to actuate and for the starter to have more room. It's still tight though nothing hits and I can remove the starter by itself.
Then came the custom exhaust system, I got a Racing Beat DIY header to start with. It came with pre-bent heavy walled 2in tubing that's long on both ends. With minimal cutting I got the tubes to clear everything and made my own collector out of a 2.5in tube. I made one side of the 2.5in tube oval shaped and trimmed the 2in header tubes to combine into that smoothly. The other challenge was the fuel tank is on the same side as the new exhaust. Which made the fuel lines close to the header, I pushed them around and fabricated the header in a way to be as far away as possible. I decided to make the exhaust cross under the drive shaft to avoid being close to the fuel tank and routed it up over the axle and out the back. I used a Vibrant Performance resonator and muffler.